
How to Warm Up Your Voice Quietly? Guide

A quiet warm-up has a specific job. It is not a rehearsal and it is not a performance test. Done well, it gets the voice coordinated, flexible, and ready to work without requiring a single full-volume note. In this information guide we will tell you how to warm up your voice quietly without disturbing others.
Quick Summary
A quiet vocal warm-up is not a full rehearsal. Its purpose is to prepare breath control, resonance, pitch movement, and articulation without forcing loud notes, whispering, or testing maximum range.
- Use a 10-minute progression: body reset, controlled airflow, gentle vibration, easy pitch slides, articulation, and one light phrase test.
- Keep the energy low. Avoid whispering, singing into a pillow, or trying to belt quietly.
- Adjust the routine to your location, such as an apartment, hotel room, recording session, or backstage setting.
- A vocal dampener can help reduce outward sound in thin-walled or shared spaces, but it does not replace good technique or a suitable place for full-volume practice.
Table of Contents
Why a quiet warm-up has a different job?
Full rehearsal and full-volume singing develop stamina, range, and projection. A quiet warm-up does none of those things and it is not supposed to. Its job is coordination and ease. Getting the body aligned, the airflow moving, the resonators awake, and the articulators loose. That is the whole brief.
Singers who try to cram rehearsal goals into a quiet warm-up end up either straining toward volume they cannot produce quietly, or whispering in ways that create more tension than they started with. Neither helps. Keeping the quiet warm-up focused on preparation rather than performance is what makes it actually useful. For more on how to practice vocals quietly without straining your voice, the full guide covers technique in detail.
How to warm up your voice quietly? 10-minute volume ladder
Step 1: Reset the Body Before Making Sound — 60 Seconds
Before any sound comes out, the body needs to be in a position that supports it. Roll the shoulders back and down. Release the jaw by letting it drop slightly rather than pushing it open. Check the tongue, it should be resting gently behind the lower front teeth, not bunched toward the back. Take two slow silent inhales through the nose and release with a relaxed exhale. Nothing effortful. Just a reset.
Step 2: Build Controlled Airflow — 90 Seconds
Start with unvoiced sounds, a steady “sss,” a sustained “fff,” a soft “shh.” The goal is not to push as much air as possible but to feel consistent, controlled airflow. Think of it as finding the channel rather than flooding it. Alternate between sounds and notice where effort creeps in. Ease back if anything starts to feel tense.
Step 3: Add Gentle Vibration — 2 Minutes
Lip trills are useful here, not because they are magical, but because they reveal quickly whether the jaw and lips are releasing or gripping. Light humming works equally well. A soft “vvv” or “ng” adds a little more resonance without requiring projection. Keep everything easy. If a sound feels like it needs effort to produce, it is not ready yet.
Exercises such as lip trills, humming, and gentle fricatives are commonly grouped under semi-occluded vocal tract exercises, which are widely used in voice training and therapy
Step 4: Move Through Pitch Without Chasing High Notes — 2 Minutes
Small slides on “woo” or “mum” through a comfortable range. Five-note patterns moving up and back down. The purpose is mobility, not range testing. This is not the moment to find out how high the voice can go — that is what a full rehearsal is for. Move through pitch the way you would stretch a muscle: gradually, without forcing the endpoint.
Step 5: Wake Up Words and Articulation — 2 Minutes
Speak a lyric phrase at a normal conversational volume. Run through a soft consonant drill — “p, t, k, b, d, g” — lightly and rhythmically. Speak-sing a short phrase from something familiar, keeping it easy and well below performance energy. This step matters for actors and voice-over users as much as singers — clear articulation does not arrive automatically after pitch work.
Step 6: The Quiet Exit Test — 90 Seconds
One easy phrase. One comfortable mid-range note held briefly. One clearly spoken sentence. Check in: does the voice feel more available than when you started? A good quiet warm-up should leave your voice feeling easier, not smaller.
What not to do when warming up quietly?
- Whispering through the whole warm-up. Whispering creates more muscular tension than light phonation does and leaves the voice less prepared, not more.
- Singing into a pillow. Muffled resistance changes how the voice functions and builds habits that do not transfer to open singing.
- Trying to belt quietly. Pulling back on volume while maintaining high-intensity singing technique creates strain. Lower the energy, not just the decibels.
- Turning it into a long workout. Ten minutes is enough. A quiet warm-up that runs forty minutes has become something else entirely.
Adjust the routine to your location
- Apartment: Steps 1 through 3 work silently or near-silently. Steps 4 and 5 at conversational volume are unlikely to carry through most walls.
- Hotel room: The bathroom often has the best acoustics and the soundest containment. Use it for steps 3 through 6.
- Before a recording session: Keep everything below performance energy. The microphone will reveal tension that feels invisible during warm-up.
- Before a live performance: Complete all six steps at least 20 minutes before taking the stage so the voice has time to settle before it is needed.
When a vocal dampener can help?
Some singers find that steps 3 through 6 still feel too exposed in very thin-walled spaces a shared dorm room, a hotel with audible neighbours, or a quiet backstage corridor. In those situations, wearing a voice dampener for singers during the middle steps of the ladder reduces outward sound enough to make the warm-up feel less intrusive.
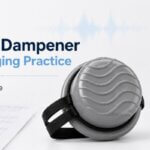
The Tilcare Vocal Dampener covers only the mouth area with a nose-free design, which means airflow stays natural throughout important for steps 2 and 3 where controlled breath is the whole point. It is lightweight enough to wear through a full warm-up without the restricted feeling that a full-face practice mask creates. It is one option worth knowing about, not a requirement.
It does not replace technique, and it does not substitute for a treated room when full-volume practice is genuinely needed.
How often should you use a quiet warm-up?
Before any practice session, recording, or rehearsal. After extended periods of speaking. On days when full-volume singing is not possible but some preparation is still useful. If the voice feels strained, hoarse, or painful at any point during the warm-up, stop rather than push through.
Best Vocal Dampener for Singing Practice: Buyer's Guide