How to Pack Breast Milk for Travel? Quick Checklist for Moms
Packing breast milk for travel is more than simply placing bottles in a cooler and hoping for the best. Done correctly, it helps keep your milk at a safe temperature from the moment you leave home until you’re ready to use it. Before you pack, it’s worth understanding how to store breast milk while travelling safely. The three essentials are pre-chilled milk, fully frozen ice packs, and a well-insulated cooler but how you pack them together makes the biggest difference.
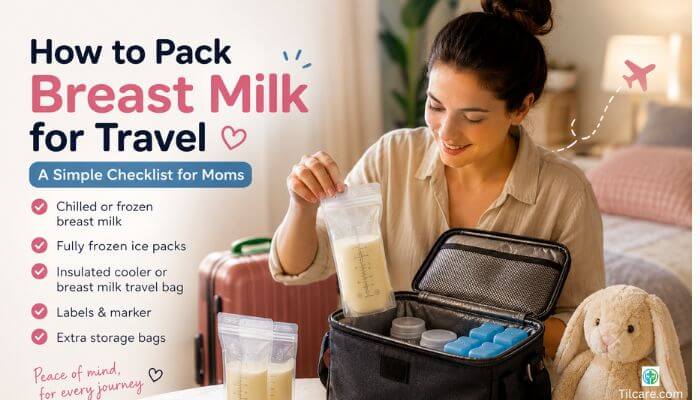
Quick Packing Checklist
Before leaving home, make sure you have these five essentials to help keep your breast milk safe, organized, and travel-ready.
Pro Tip: Pre-chill your cooler before packing to help maintain a safe temperature for longer.
Table of Contents
How to Pack Breast Milk for Travel?
Getting the sequence right is the single most overlooked part of traveling with breast milk. Rushing or packing out of order breaks the cold chain.
- Chill or freeze the milk. Fresh milk should be refrigerated until cold before it goes into the cooler. If you’re taking frozen milk, keep it in the freezer until the very last moment.
- Freeze the ice packs completely. A partially frozen ice pack can’t do the job. Freeze them for at least 24 hours beforehand overnight if possible.
- Pre-chill the cooler. Place a spare ice pack inside the empty cooler for 15–30 minutes before packing. This drops the ambient temperature inside so your real packs don’t have to work as hard from the start.
- Pack the milk between ice packs. Layer: ice pack → milk → ice pack. Surrounding the milk on multiple sides keeps it consistently cold instead of cold on one side and warming on the other.
- Seal it and leave it sealed. Every time you open the cooler, you let warm air in and cold air out. Pack what you need accessible separately (like a single feeding’s worth) and don’t crack the main cooler until necessary.
What most moms forget to pack?
The basics are easy to remember. These are the things that tend to get left behind — and that you’ll wish you had.
- Extra storage bags. Bags can develop pinhole leaks, or you may pump more than expected. Always pack two or three extras.
- A permanent marker. Labels smudge and storage bag labels wash off. A Sharpie lets you write the date and time directly on the bag and it stays put.
- A spare ice pack. If a trip runs long or a layover stretches, a third ice pack can buy you several extra safe hours.
- Cleaning wipes or soap. For quickly wiping down pump parts or cooler handles when a sink isn’t handy.
- Zip-lock bags for leaks. Place each storage bag inside a zip-lock as a second layer of protection. A single leaky bag won’t ruin everything else in the cooler.
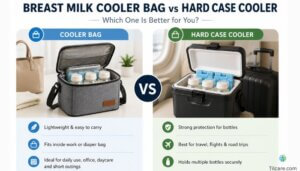
Should you use bottles or breast milk storage bags?
Both work. but not equally well depending on how you’re traveling. If you’re still deciding between soft and hard cooling options, see our guide on breast milk cooler bag vs hard case cooler:
| Feature | Bottles | Storage Bags |
| Space | Bulky; take up significant cooler room | Flat when frozen; stack efficiently |
| Leak protection | Excellent with a tight lid | Prone to pinhole leaks; needs a zip-lock backup |
| Reusability | Reusable indefinitely | Single-use (most brands) |
| Best for travel | Short outings with one or two feeds | Multi-day trips or flights with larger stashes |
Short trips (under 4 hours): Bottles win. Less fuss, no double-bagging needed, and easy to hand off for a feed without transferring milk.
Long trips and flights: Storage bags are the better choice. They pack flat, take up less cooler space, and let you carry more milk per pound of luggage. Just always keep each bag inside a zip-lock.
Packing tips for different trips
Short outings (under 4 hours)
Pack only what you need plus one extra serving. A small insulated lunch bag with a single frozen ice pack is enough to keep milk safe for this window no need for a large cooler that takes up half your bag.
Full-day trips
Use a dedicated insulated breast milk bag or the best portable breast milk cooler for longer days away from home. Pre-chill the bag before packing, and if your destination has a refrigerator or freezer (an office, a family home), ask to use it to refresh your ice packs mid-day.
Flights
The TSA allows breast milk in quantities over 3.4 oz in carry-on bags and does not require it to be in a quart-sized bag it is exempt from the standard liquid rules. Declare it separately at the security checkpoint and request a visual inspection if you prefer your milk not to go through the X-ray. Carry all breast milk in your carry-on, never in checked luggage where temperatures are uncontrolled and bags can be lost.
Mistakes that can warm the milk faster
Avoiding these four habits will do more for milk safety than buying a more expensive cooler.
- Packing warm milk with cold milk. Fresh pumped milk raises the temperature of everything around it. Always chill new milk in a fridge first before adding it to a cooler with already-cold milk.
- Leaving empty space inside the cooler. Air gaps warm up quickly. Fill empty space with a small towel, additional zip-lock bags, or a third ice pack. A packed cooler holds temperature far longer than a half-empty one.
- Opening the cooler repeatedly. Every time the lid comes off, cold air escapes and warm air rushes in. Pre-separate anything you’ll need frequently so the main cooler stays closed.
- Setting the cooler in direct sunlight. In a car, a hot bag on a sunny seat can warm faster than an ice pack can compensate. Keep the cooler in shade or in the footwell, and never leave it in a parked car in warm weather.
Checklist before you leave home
Run through this final check before you walk out the door:
✓ Milk labeled with date and time pumped
✓ Ice packs frozen solid (not just cold)
✓ Cooler pre-chilled with a spare ice pack
✓ Pump and accessories packed (if pumping on the go)
✓ Backup storage bags and a permanent marker in the bag
Frequently asked questions
Can I pack freshly pumped milk for travel?
Yes, but freshly pumped milk should ideally be chilled before packing with already cold or frozen milk.
How many ice packs should I use?
Use enough frozen ice packs to surround the milk on multiple sides and keep the cooler consistently cold
Are breast milk storage bags better for travel?
Storage bags save space, while bottles offer better structure and leak protection,so the best choice depends on trip length and packing space.
Should I pre-chill my cooler?
Yes, pre-chilling the cooler helps it stay colder longer once the breast milk and ice packs are packed inside.