How to Remove Ear Wax at Home Safely (Step-by-Step Guide)?
Is it safe to self-remove the earwax or how to do it at home? Before that, we must understand that earwax is medically known as cerumen, which is produced naturally to protect the eardrum from dust particles and debris, which means it is not a sign of poor hygiene.
That said, some people do experience a build-up that causes discomfort or muffled hearing. In these cases, gentle home removal is generally considered safe provided the right methods are used, no underlying conditions are present, and care is taken not to push wax deeper into the canal.
As per the NHS, notes that the ear canal is delicate and should never be probed or scraped. The Mayo Clinic similarly advises against inserting any objects, even cotton swabs, into the ear. Safe home removal means working with the ear’s natural anatomy, not against it.
Table of Contents
When to avoid the ear wax removal at home?
One should remember that if you are facing any below-mentioned issues than you should avoid it doing at home:
- Ear pain, tenderness, or a sense of heat inside the canal
- Discharge (fluid, pus, or blood) coming from the ear
- A known or suspected perforated (ruptured) eardrum
- A history of ear surgery or grommets (ear tubes)
- Sudden or severe hearing loss in one or both ears
- A feeling of significant blockage that has come on quickly
- Tinnitus (ringing) that has worsened recently
These symptoms may indicate an infection or structural issue that requires professional assessment. Attempting irrigation or softening drops in these situations can make things considerably worse. When in doubt, a quick consultation with a pharmacist or GP is always the safer choice.
What are the signs of ear wax build up?
Although, access of ear wax comes out naturally but sometimes it accumulates to a point of causing symptoms.
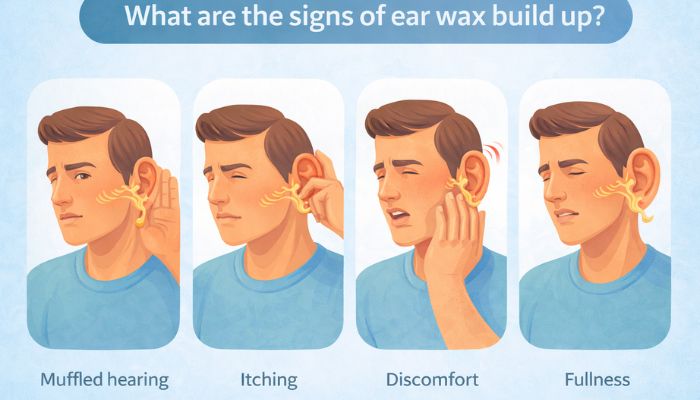
The following are the most commonly reported signs of a significant blockage:
- Muffled or reduced hearing
- Sensation of fullness in the ear
- Persistent itching inside the canal
- Mild earache or discomfort
- Ringing or buzzing (tinnitus)
- Feeling of pressure
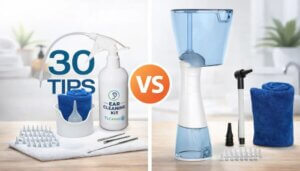
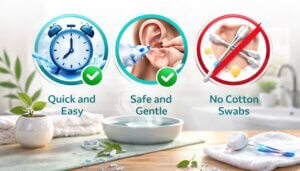
What are the safe methods for ear wax removal at home?
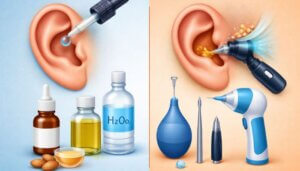
There are multiple approaches by which one can perform the self-removal of earwax at home, either by a manual or an electric earwax removal tool. Below are some other methods that can be effective :
Warm Water Irrigation
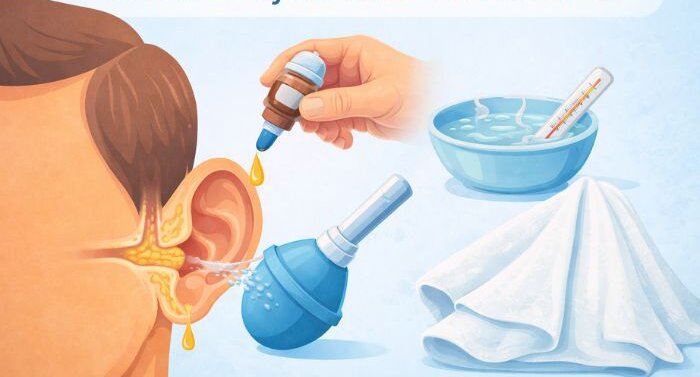
Flushing your ear with warm water is a simple and time-tested method. The water helps loosen the wax so it can flow out on its own.mOne thing most people overlook: temperature matters. Water that’s too cold or too hot can make you feel dizzy because it affects your inner ear’s balance system. Use water that feels comfortable on your wrist roughly body temperature (37°C). Not warm, not cool. Just neutral.
For the actual flushing, use a rubber ear bulb syringe you can pick one up at any pharmacy for a few pounds. Squeeze it gently. You want a slow, steady stream of water, not a hard jet. Avoid using anything designed for nasal rinsing or any device with strong water pressure the ear canal is far more delicate than it looks.
Ear Drops for Softening Wax
This is one of the most commonly used household remedy. The ear drop softens hardened wax so your ear can push it out naturally or so that flushing with water actually works when you get to that step.
Another method in ear drop is using warm olive oil applied with a dropper works well and is recommended by the NHS as a starting point. If you’d prefer a pharmacy option, look for drops containing carbamide peroxide, sodium bicarbonate, or almond oil all common and easy to find. Just don’t expect the drops to clear the wax on their own. Use them for a few days first, then move on to irrigation. Skipping this step and going straight to flushing especially with wax that’s hard and packed in rarely works well.
Some tools are designed only for the very entrance of the ear canal silicone spiral cleaners or soft-tipped irrigation kits (the Tilcare Ear Wax Removal Kit is one commonly used example). Used correctly, they’re fine. The problem is most people push them in further than they should.
One simple rule: if you can’t see the tip, it’s too deep. Stop there. Never go past the first few millimetres of the canal. And if a product requires force or deep insertion to work, it’s not suitable for home use no matter what the packaging says.
Related reading: Best Ear Wax Removal Tool at Home | Complete Guide 2026
What to avoid when cleaning your ears?
Generally, people use anything to clean or scratch their ears, which is harmful and may cause issues. Below are the points that one must avoid when cleaning the ears:
- Cotton swabs: These push wax further into the canal rather than removing it, compacting it against the eardrum. The NHS explicitly advises against their use inside the ear.
- Sharp or rigid objects: Bobby pins, pencils, fingernails, or any improvised tool will damage or brush the delicate skin of the canal or puncturing the eardrum — a painful and potentially serious injury.
- Ear candles: No credible clinical evidence supports ear candling as effective for wax removal. Studies have shown that they neither create suction nor soften wax, and they carry documented risks of burns and candle wax deposits in the canal.
- Excessive cleaning frequency: Cleaning the ears too often strips away protective wax and disrupts the canal’s natural environment, which can lead to dryness, itching, and increased susceptibility to infection.
- High-pressure water jets: Shower heads, water flossers, or dental irrigators can deliver pressure that is far too forceful for the ear canal and may damage the eardrum.
How often should you clean your ears?
Routine ear cleaning is not a hygiene requirement in the same way that brushing teeth or washing skin is. Intervening too frequently disrupts this process and can actually cause the very problems it is meant to prevent. If you have no symptoms, there is no reason to clean beyond wiping the outer ear with a damp cloth after bathing.
We have seen that most individuals clean the ear on daily basis after the shower which is a wrong practice. As we know that the ear wax develops naturally to protect ear drum from dust particles, debris or any foreign object to enter. The ear canal has a remarkable self-cleaning mechanism skin cells naturally migrate outward from the eardrum, carrying wax with them. Jaw movements during talking and chewing also help move wax toward the outer ear.
If you are someone prone to wax build-up a small number of people do produce excess wax due to anatomy or genetics occasional softening with olive oil drops (once every few weeks) is a reasonable and gentle preventive measure. There is no universal frequency that applies to everyone.
Frequently Asked Questions
Is it safe to remove ear wax at home?
Yes, for most adults with no underlying ear conditions, gentle home removal using warm water irrigation or softening drops is considered safe. It is not safe if you have ear pain, a history of eardrum perforation, or recent ear surgery. When in doubt, consult a pharmacist first.
Can I use water to clean my ears?
Yes, but only lukewarm water delivered via a soft-tipped bulb syringe at gentle pressure. Never use a showerhead, hose, or high-pressure device directly in the ear canal.
Are ear wax removal tools safe?
Some are, within their designed limits. Bulb syringes and silicone spiral cleaners used only at the outer canal opening are generally safe. Cotton swabs, ear candles, and any rigid object inserted deeply are not. Always follow manufacturer guidance and avoid deep insertion of any tool.
How long does it take to remove ear wax at home?
The process usually takes 5–7 days in total: 3–5 days of daily softening drops, followed by one or two gentle irrigation sessions. Attempting to rush the process without softening first is less effective and more likely to cause discomfort.
Manual vs Electric Ear Wax Removal Tool — Which is Better? (2026)
?)
?)